Harness the power of Retrieval Augmented Generation (RAG) to create an intelligent document interaction system using FastAPI, Haystack, ChromaDB, and Crawl4AI.
Table of Contents
- Problem statement
- Prerequisites
- Project components
- Setting Up the Environment
- Building the FastAPI Server
- Building the Haystack RAG pipeline
- Testing the APIs
- Conclusion
- Optional: Adding Asynchronous Processing with Celery
Problem Statement
The problem statement is to develop a backend system that, provided any URL as input, allows the user to converse about its contents.
For example, given a news article input or a hosted PDF as input users should be able to ask questions about that PDF or the web article like
- what is the PDF about?
- summarize the article for me in 100 words
- Or any particular question about the URL
Introduction
In the era of information overload, extracting relevant information from vast amounts of data is a significant challenge. Retrieval Augmented Generation (RAG) combines retrieval and generation to provide precise answers from specific documents. In this article, we’ll build a RAG pipeline that allows users to ingest any URL from various sources and interact with them using natural language queries.
We’ll utilize:
- FastAPI: For building the RESTful API.
- Crawl4AI: A powerful tool for asynchronous web crawling and data extraction.
- Haystack: An open-source framework for building search systems.
- ChromaDB: A vector database for storing embeddings.
Optional Components:
Celery and Redis: For asynchronous task processing to handle long-running tasks in the background.
Prerequisites
Before diving in, ensure you have the following:
- Python 3.8+ installed.
- Familiarity with Python and FastAPI.
- Basic understanding of RAG and how it works.
Project Components
- FastAPI Server: Exposes two endpoints:
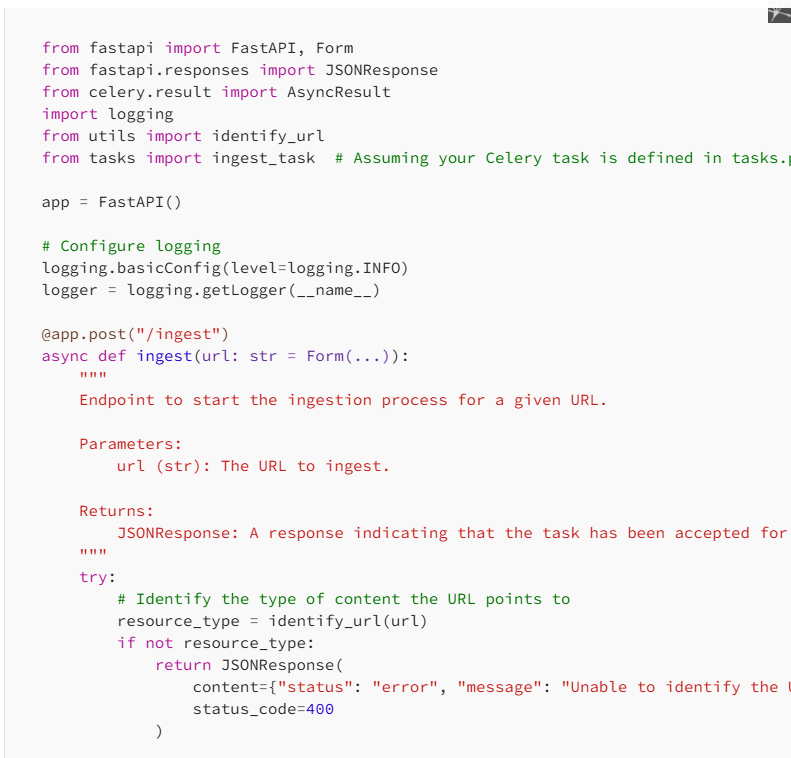
- Ingest API: Accepts a URL, processes it, and stores the content.
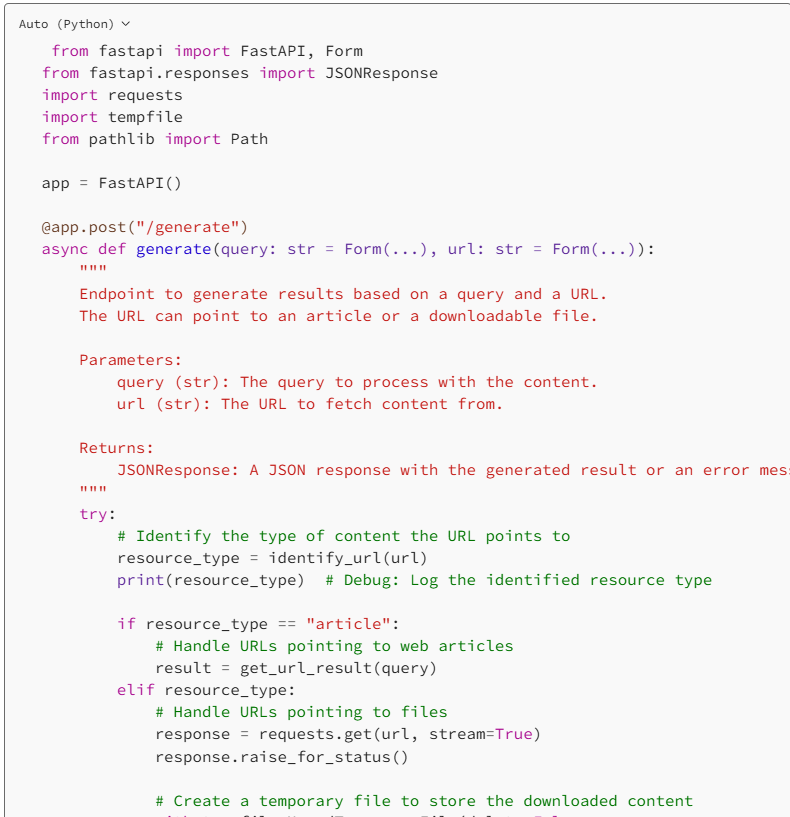
- Generate API: Accepts a question and the URL (same as ingestion) retrieves relevant content to generate an answer.
2. Crawl4AI: Simplifies asynchronous web crawling and data extraction.
3. Haystack with ChromaDB: Stores and retrieves document embeddings.
Setting Up the Environment
We’ll set up the project from scratch using the provided instructions.
1. Create a Project Directory
Create a new directory for your project and navigate into it.
2. Create a Virtual Environment
Create and activate a virtual environment to manage project dependencies
For Windows:
python -m venv venvvenv\Scripts\activateFor macOS/Linux:
python3 -m venv venvsource venv/bin/activate3. Install Dependencies
We’ll need several Python packages.
Install them using pip:
pip install fastapi uvicorn[standard] requests crawl4ai farm-haystack chromadb chroma-haystack haystack-ai ollama-haystack python-multipartAlternatively, you can create a requirements.txt file with all dependencies and install them with
requirements.txt
haystack-aiollama-haystackchroma-haystackpython-multipartfastapiuvicorncrawl4ai[sync]playwrightpypdfmarkdown-it-pymdit_plainfiletypeCelery[redis] # OptionalInstall the dependencies:
pip install -r requirements.txt4. Install Playwright and its dependencies
playwright installplaywright install-depsBuilding the FastAPI Server
Create a file named main.py and set up the FastAPI app.
from fastapi import FastAPIapp = FastAPI() # initialize the Fastapi app1. Handling Different URL Types
First let us create a utility that given a URL as input, classifies it into two basic categories.
- File: .pdf, .txt, .md, etc
- Web-page or article
We’ll use the requests and mime-types libraries to identify file types based on the URL’s content type.


This function returns the URL’s mime type, representing what type of URL it is.
It returns “article” if it is a web page or web article and the file extension if it is a document such as .pdf for PDF files, .txt for text files, .md markdown, etc.
2. Crawling Web Articles with Crawl4AI
What is Crawl4AI?
Crawl4AI simplifies asynchronous web crawling and data extraction, making it accessible for large language models (LLMs) and AI applications. It handles the complexities of HTTP requests, parsing, and data extraction, providing a straightforward interface for developers.
Using Crawl4AI to Scrape Web Articles
We will create an asynchronous function that given a URL scrapes it using the crawl4ai python package.
Check out the crawl4ai documentation if you need help with it.
Example Usage:

We will make use of the AsyncWebCrawler to pass another class object LLMExtractionStrategy from crawl4ai to it.
The LLMExtractionStrategy takes the following important parameters as input,
- provider — The LLM provided which you want to use, for this tutorial, we will use Ollama, which is a locally hosted LLM. Alternatively, you can also use other LLM providers as suggested on the LiteLLM docs
- base_url — The api_base where you have your Ollama hosted, if you have it hosted locally it should be something like localhost:11434
- instruction: The prompt or instruction you want to send to the LLM while scraping the page
- api_token — the api_key if using hosted LLM providers like Openai or Gemini.
You can check out all other parameters that it takes in its documentation.
3. Implementing the Ingest Endpoint
Now, Let us create the ingest endpoint first, which accepts the URL as an input, determines its category using the identify_url function that we created earlier, and passes it to two different ingestion functions namely ingest_url and ingest_file that we will be creating soon.


4. Implementing the Generate API
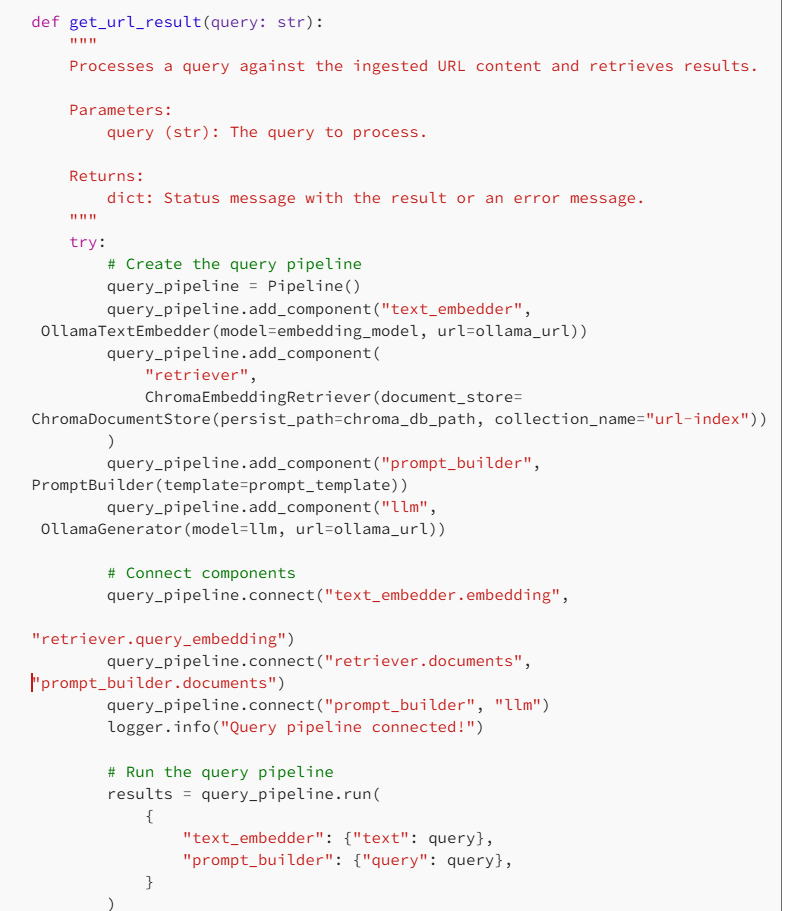
Now, we shall also create an endpoint that given the URL and a question, classifies it using the indetify_url function and routes it to different two functions namely get_url_result and get_file_result to generate the response for that question. We will also create these functions soon.


Building the HayStack RAG pipeline
Let us implement the logic for the ingestion and result generation functions.
First, let us set up the LLM Backend, we will be using the same LLM that we used for crawling for chat purposes.
Note that, since RAG requires two kinds of models, one for conversations and one to generate embeddings, we will require two and install them on our llama before using it.
Here, I am using llama3.2 for chat and nomic-embed-text for the generation of embedding.
Note that you don’t need to worry about how embedding or the chat is being handled, you just have to pass the model names, and Haystack will take care of it all.
Setup the LLM Backend and Prompt


Note: Replace Your_Ollama_URL with your ollama URL
Now, let us build the necessary functionality to process the documents and URLs, separately.
Processing URLs


Processing Documents


Testing the APIs
- Starting the FastAPI Application
In your terminal or command prompt, navigate to your project directory and activate the virtual environment.
Then run:
uvicorn main:app - reload2. Testing with API Documentation
FastAPI provides interactive API documentation at http://localhost:8000/docs.
You can test your APIs directly from this interface. You will see the swagger-UI like this.
Testing the Ingest API
- Open your web browser and navigate to http://localhost:8000/docs.
- Find the /ingest endpoint and expand it.
- Click on the “Try it out” button.

- Enter a URL to ingest (e.g., a web article or a PDF link).
- Click “Execute”
- You’ll receive a confirmation message if the content is ingested successfully.

Testing the Generate API
- Once the content is ingested, find the /generate endpoint.
- Click on “Try it out”

- Enter a question and a URL related to the content of the ingested document.
- Click “Execute” to receive answers from the system.
Conclusion
We’ve built a robust RAG pipeline that:
- Accepts various document types (web articles, PDFs, text files).
- Uses Crawl4AI to simplify web crawling and data extraction.
- Allows users to interact with the content using natural language queries through FastAPI.
- Utilizes Haystack and ChromaDB for efficient storage and retrieval of document embeddings.
This system can be extended to support more features like authentication, additional file types, and enhanced error handling. By integrating these technologies, you’ve created a scalable and efficient pipeline for document ingestion and interaction.
Optional: Adding Asynchronous Processing with Celery
For long-running tasks like ingesting large documents or crawling extensive web content, it’s beneficial to handle these tasks asynchronously. This ensures that your API remains responsive and doesn’t time out.
What are Celery and Redis?
- Celery: An asynchronous task queue/job queue based on distributed message passing.
- Redis: An in-memory data structure store used as a database, cache, and message broker.
Implementing Asynchronous Ingestion
- Install Celery and Redis
pip install celery[redis]Ensure that Redis is running on your system. If not, install and start Redis according to your operating system’s instructions.
2. Create a Celery Worker
Create a file named celery_worker.py


3. Modify the Ingest Endpoint
In main.py, update the ingest endpoint to use Celery.


4. Starting the Celery Worker
In a new terminal or command prompt window, navigate to your project directory and activate the virtual environment.
Then run:
celery -A celery_worker.celery_app worker --loglevel=info5. Testing Asynchronous Ingestion
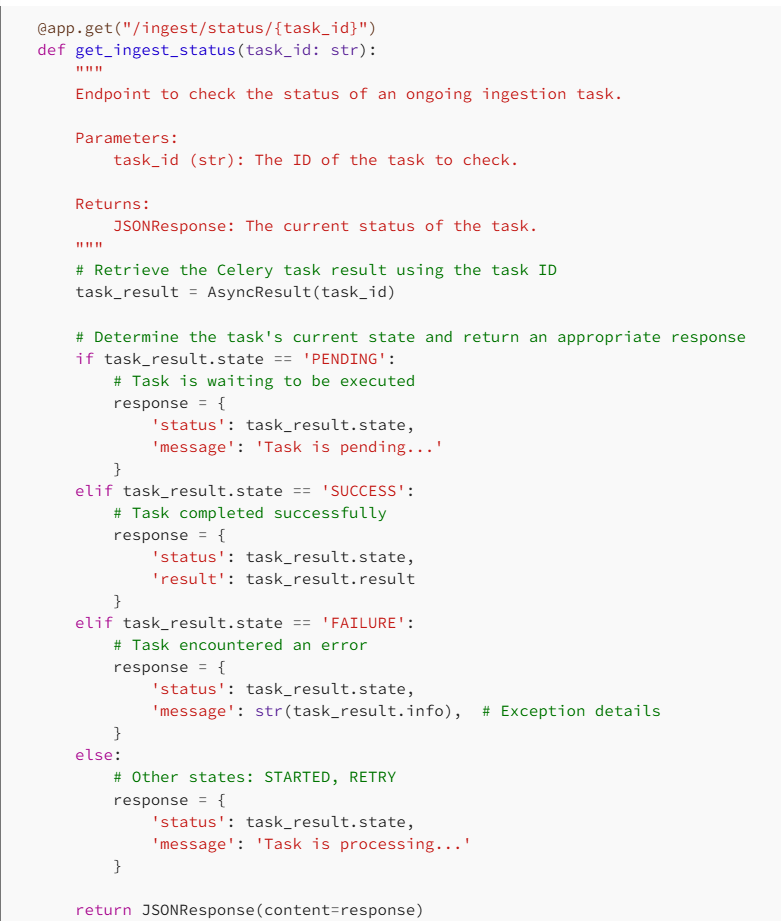
Follow the same steps in the Testing the APIs section, but now the ingestion will run in the background. You can check the status of your ingestion task using the /tasks/{task_id} endpoint.
Additional Resources
- Crawl4AI Documentation: Learn more about how to use Crawl4AI for web crawling and data extraction.
- FastAPI Documentation: Learn more about building APIs with FastAPI.
- Haystack Documentation: Explore advanced features of Haystack.
- ChromaDB Documentation: Understand how to manage vector embeddings.
- Celery Documentation: Dive into asynchronous task processing.
- Redis Documentation: Learn about in-memory data structures and caching.
Happy coding! If you have any questions or suggestions, feel free to reach out or leave a comment.